Applying Service Update to Microsoft Dynamics 365 Finance & Operations OneBox Development Environment
Keeping your local one-box environment up to date is important for testing, development, and staying aligned with the latest platform improvements. In this post, we will walk through a simple and practical approach to upgrading Dynamics 365 Finance One-Box from version 10.0.46 to 10.0.47 which has been released on March 13, 2026 Dynamics 365 Finance 10.0.47.
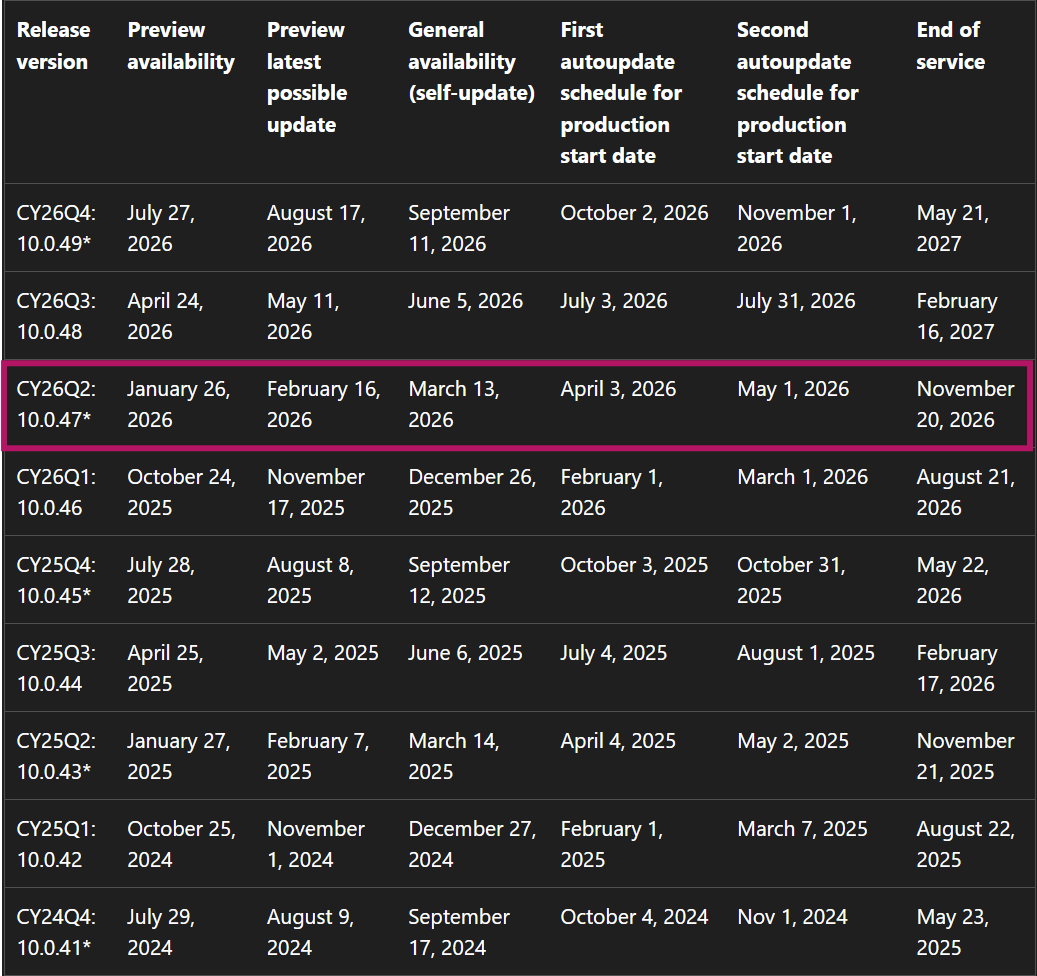
In my case, my one-box development environment version is 10.0.46 it running locally not in cloud so I want to upgrade to the latest version since UAT and Production automaticaly they recive update from Microsoft based the following release schedule.
Step 1: Download the Service Update
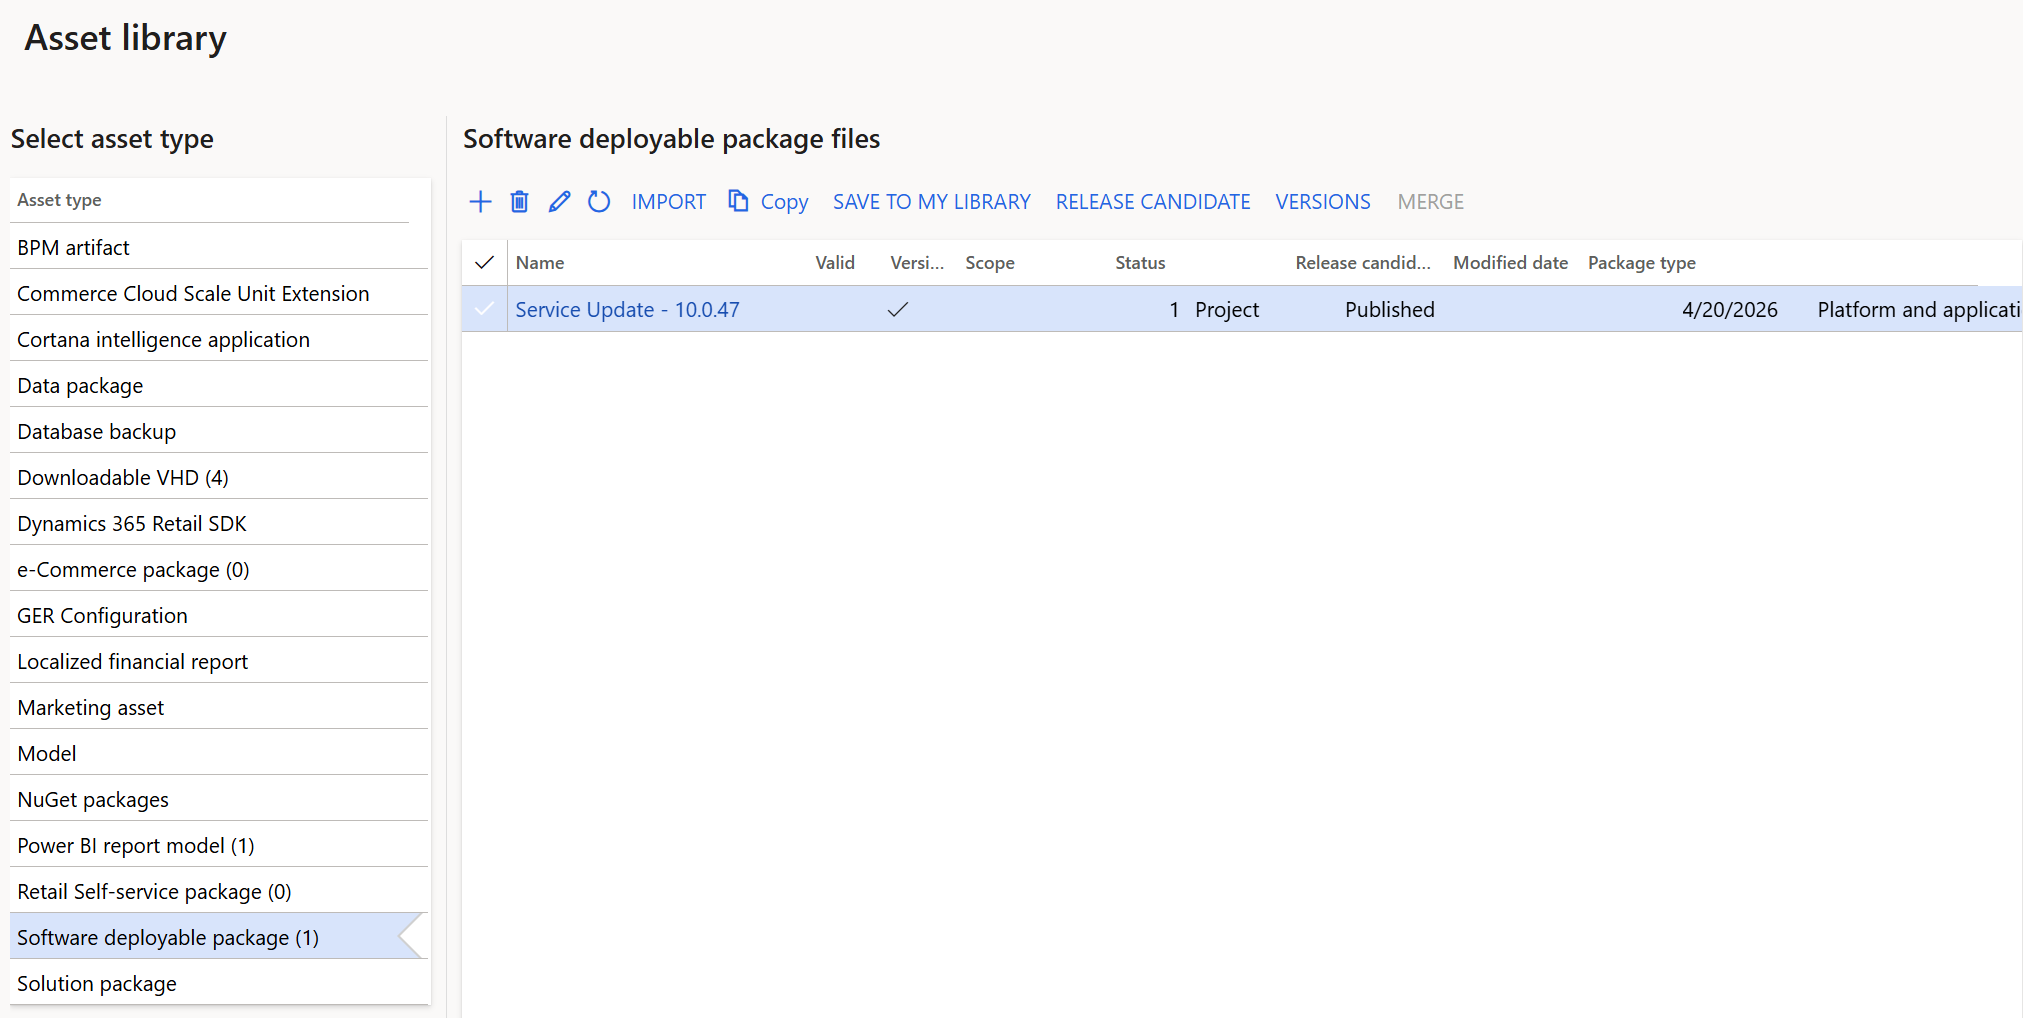
First, go and download the latest Service Update 10.0.47 from the LCS Software Deployable Package.
Step 2: Unblock and Extract
After downloading:
- Right-click the ZIP file
- Go to Properties
- Check “Unblock”
- Click OK
- Extract it to a folder like:
C:\Temp
This step ensures Windows does not block the files.
Step 3: Edit Topology File
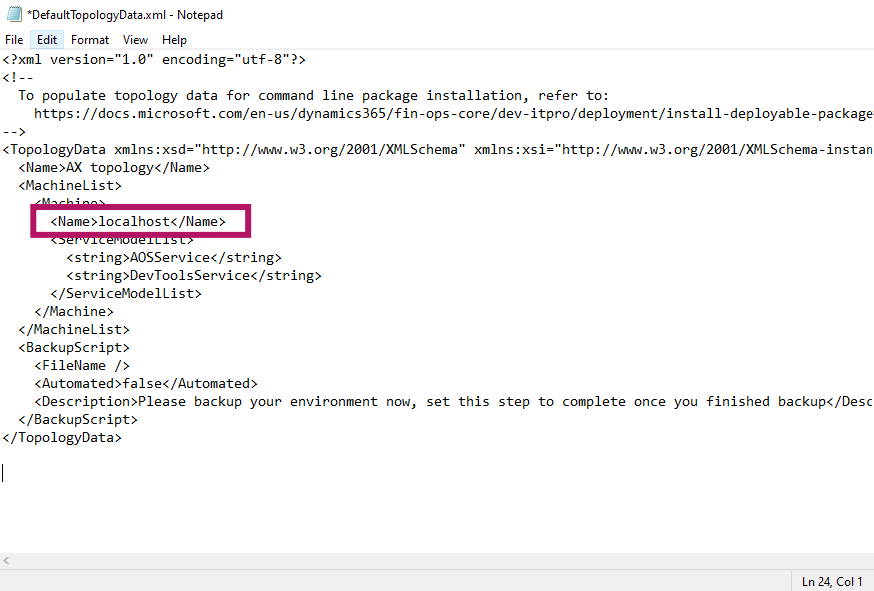
Open DefaultTopologyData.xml in a text editor.
Replace:
<Name>localhost</Name>
With your machine name, for example:
<Name>dvhd10046vm</Name>
Step 4: Check Installed Components
Open Command Prompt and navigate to:
C:\Temp\FinanceAndOperations_10.0.2527.42_Application
(Note: FinanceAndOperations_10.0.2527.42_Application is the name of the service update ZIP file after extraction)
Run this command:
AXUpdateInstaller.exe list
This command shows all installed services on your current machine.
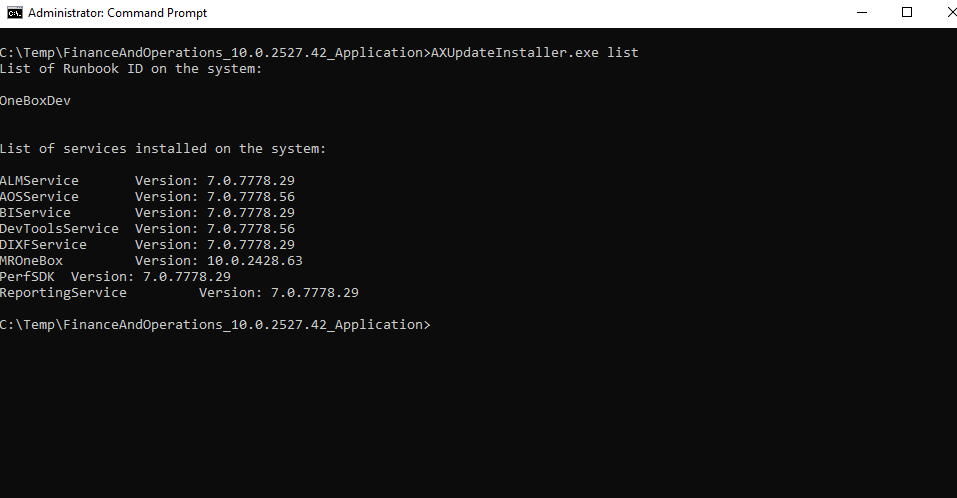
Now copy those services and paste them into DefaultTopologyData.xml under <ServiceModelList> put them between <string> </string> tag as shown in the folloing.
<?xml version="1.0" encoding="utf-8"?>
<!--
To populate topology data for command line package installation, refer to:
https://docs.microsoft.com/en-us/dynamics365/fin-ops-core/dev-itpro/deployment/install-deployable-package
-->

<TopologyData xmlns:xsd="http://www.w3.org/2001/XMLSchema"
              xmlns:xsi="http://www.w3.org/2001/XMLSchema-instance">
  <Name>AX topology</Name>
  <MachineList>
    <Machine>
      <Name>localhost</Name>
      <ServiceModelList>
        <string>AOSService</string>
        <string>ALMService</string>
        <string>AOSSERVICE</string>
        <string>BIIService</string>
        <string>DevToolsService</string>
        <string>DIXFSERVICE</string>
        <string>MROneBox</string>
        <string>PerfSDK</string>
        <string>ReportingService</string>
      </ServiceModelList>
    </Machine>
  </MachineList>
  <BackupScript>
    <FileName />
    <Automated>false</Automated>
    <Description>
      Please backup your environment now, set this step to complete once you finished backup
    </Description>
  </BackupScript>
</TopologyData>
This step connects your update file with your real system services.
Step 5: Generate Runbook
In this step we generate Runbook file after run the folloing command in C:\Temp\FinanceAndOperations_10.0.2527.42_Application directory a new xml file will be generate it called LocalOneBoxDev-runbook.xml
Note: You can use your favorite name for the Runbook file.
Run this command:
C:\Temp\FinanceAndOperations_10.0.2527.42_Application\
AXUpdateInstaller.exe generate -runbookid="OneBoxDev" -topologyfile="DefaultTopologyData.xml" -servicemodelfile="DefaultServiceModelData.xml" -runbookfile="LocalOneBoxDev-runbook.xml"
Note: Runbook is a file used to automate processes or execute scripts step by step.
Step 6: Import Runbook
This command is used to load previous generated Rubbook file into the system.
Run this command:
AXUpdateInstaller.exe import -runbookfile="LocalOneBoxDev-runbook.xml"
Step 7: Verify Runbook
Run again:
AXUpdateInstaller.exe list
Check if your runbook (OneBoxDev) is listed this means everything is ready.
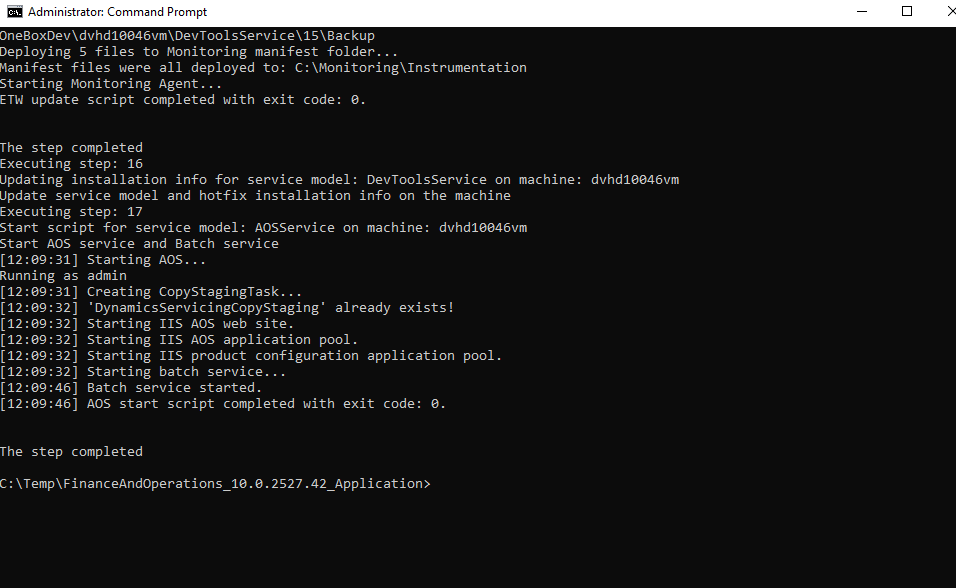
Step 8: Execute Runbook
Run this command:
AXUpdateInstaller.exe execute -runbookid="OneBoxDev"
This command executes the RunBook file and starts the update process it may take a long time wait until every steps will complete.
Step 9: Export Runbook
Run this command:
AXUpdateInstaller.exe export -runbookid="OneBoxDev" -runbookfile="LocalOneBoxDev-runbook.xml"
This command is optional it saves your runbook for backup or future use.
Finally new version updated succesfully
Installed product version : 10.0.47 (10.0.2527.42)
Installed platform version : Update71 (7.0.7858.27)